I still consider myself to be a bit craft-challenged, but I’ve been itching to try my hand at another DIY project ever since my leather handbag renewal tutorial. I struck gold when I landed on MopTopMaven’s blog and saw her step-by-step instructions on how to jazz up a plain tee. If you haven’t had a chance to check out her blog, please do because the girl has amazing style… and hair… and she can cook!
I love embellished tees and couldn’t wait to try making my own, but I had to make a few modifications to her version because:
a) I don’t have a sewing machine, and
b) I don’t keep fabric laying around, and I haven’t stepped foot in a fabric store since middle school
So the moral of the story is this: if I can do it, anyone can … seriously!
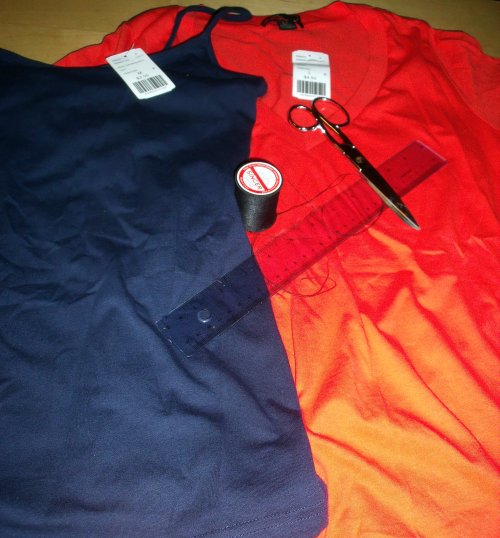
Here’s what you’ll need to complete this project:
- A t-shirt (v-neck or scoop neck styles will probably work best)
- A second t-shirt or tank top (to cut into strips for the ruffles)
- Scissors
- Ruler
- Straight pins
- Needle & thread (the thread color should match the ruffle material)
First I cut my tank top up the side seams so that I had two pieces. Using a ruler, I then cut each side into 5 3-inch strips, making 10 strips total.

Now this is the part where a sewing machine REALLY would have come in handy (or maybe not since I’ve never used one)…
I folded each strip in half lengthwise and made small stitches running down the center. After the first two strips, I started getting lazy. So the stitches got progressively larger as shown below.
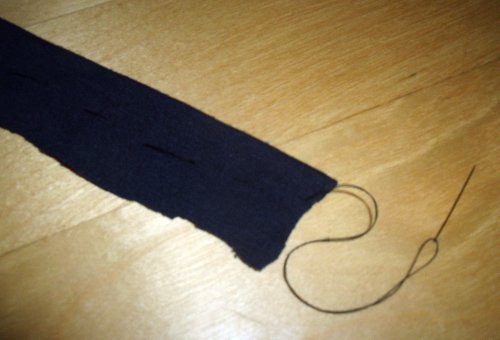
After that, I just pulled the thread taut through the fabric to make a small ruffle and tied off the excess thread with a knot before cutting it off.
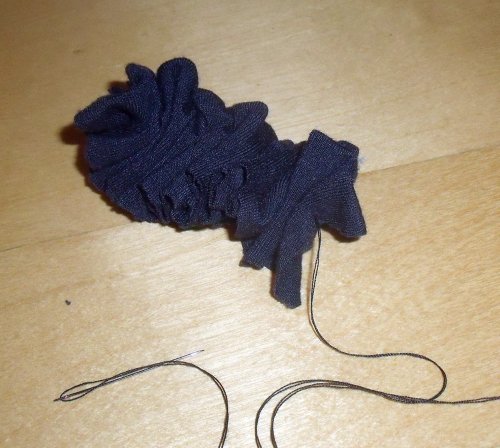
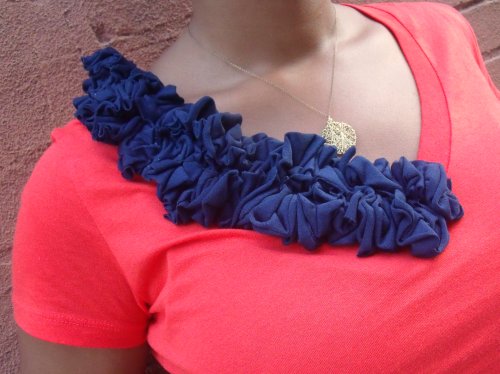
Once all of my ruffles were done, I had to decide on placement: Shoulders or neckline..?
I decided to go with the neckline and pinned the ruffles where I thought they should go before stitching them into place.
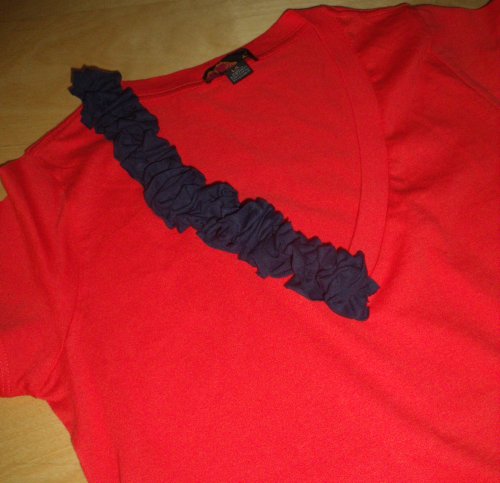
Initially, I was going to put ruffles all the way around, but I kind of liked the asymmetrical look. So, I just doubled up with a second row of ruffles right next to the first row for a fuller effect.
And voila!
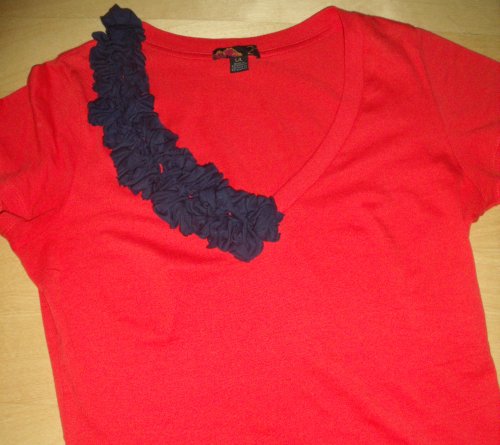
I received several compliments when I wore it the next day, so stay tuned for a full outfit post!
P.S.
Don’t forget to enter this month’s Makeup Giveaway for a chance to win an exclusive Lord & Taylor Goodie Bag! A winner will be announced on August 27th.